Danny King's "Beautiful Doll"

About Me

I'm a "still-working" professional who has been blessed with a wonderful, supportive wife, great kids (now grown) and a fulfilling career. I love spending time with my spouse, family and friends, and enjoy "hands-on" recreational projects. I've been enamored with aviation since my "Sky King" Saturday mornings of decades past. I obtained my private ticket while still in my teens, and have enthusiastically participated in a variety of aviation related endeavors since. I currently fly a factory-built composite single engine aircraft. However, the actual "nuts and bolts" of aviation have always fascinated me. I've considered building my own plane for years, With the support of my wife, I'm undertaking what I anticipate to be a multi-year project. While I'm reasonably good with my hands, I realize that this project is going to require a whole new knowledge and skill set. I've never "blogged", but figure that trying to master this communication medium will carry its own challenges and rewards. I enjoy journeys as much as destinations, and have no goals for this project other than fun! Hope I can share some of my enthusiasm with you!

Friday, November 26, 2010

Finished Horizontal Stabilizer - Total 57 hours


Great Thanksgiving week! Kids were home (for a few days, at least) and we shared a wonderful holiday with family and friends. Even though I had family and work commitments, still managed to break away for a few hours in the shop and - lo and behold - suddenly the horizontal stab was finished. Van's is right - you learn a LOT during this stage. I drilled out more than a few errors, but acquired (I hope!) some valuable insights along the way. A key lesson was that when I encounter a simple instruction - say "don't rivet this hole" - then mark the hole then and there, even if I'm simply reading several steps ahead. More than once I thought "I'll remember that when I'm back in the shop next time" - and of course I didn't. Overall, even with the errors (and self-inflicted "lessons learned") I enjoyed every minute. Finished this stage with exactly 57 hours of actual construction time in my builder's log. Hope the next couple of thousand are equally enjoyable!!

Sunday, November 14, 2010

Good week!


I managed to get out in the shop several times this week. Riveted the rear spar HS-609 bars to HS-603 rear spar, then attached the hinge brackets and center bearing. Unfortunately, I also learned about the perils of using an uncalibrated, borrowed torque wrench. I way over-torqued the bolts attaching HS-411! Quick email order to Vans for new bolts and nuts!! (Fortunately less than $8 plus mailing for the set - maybe the cheapest aviation-related purchase I've ever made). After searching options on Vans Air Force web site, I decided to purchase a ParkTool beam-type torque wrench calibrated in 0-60 inch pounds. $30 dollars to Amazon and one day later it's in hand! This weekend I finished the front spar assembly and riveted on the HS-801 left skin. Lots of practice in squeezing, riveting and drilling out bad rivets, but in the end I'm pretty happy with the result. Next - right side skin, then I'll have my first "congratulations - you've finished the first major sub-assembly on your new airplane" (to quote page 6-4 of the Van's Construction Manual)!!

Sunday, November 7, 2010

Priming Day


I was out of town on a business trip most of this week - BUT - had the opportunity to spend a few hours in the Smithsonian Air and Space Museum yesterday (mall only this time). This was my first visit in almost a decade (since Sept 11, 2001 as a matter of fact - but that's another story). Talk about inspiring!! I couldn't wait to get back in the shop. Arrived home around noon, unloaded the bags and I was off and running. I had previously decided to go the "rattle can" route for priming. The opinions on "best" priming method(s) are all over the board, but a lot of RV builders over the past few years have seemed satisfied with the NAPA 7220 gray self etching primer. After a little experimentation (and a lot of web searching/browsing) I decided that was my choice. I picked up a couple of cases of the primer during the NAPA October sale for $4.99 a can (usually 9.99) before I left town last week. Today I cleaned all of the bare aluminum surfaces on the horizontal stabilizer parts (now all deburred, dimpled, etc. etc.), lightly scuffed the surfaces to be primed with a red scotch brite cloth, then cleaned everything again with acetone. Finally I moved the pieces into my paint booth (a table in my wife's garden potting patio outside my workshop - thanks honey!) and got to work. The conditions were ideal - 70 degrees, gentle breeze and no bugs - and in short order the job was done. Used about 3 cans total. I'm pretty pleased with the results for a first effort.

Friday, October 29, 2010

Deburring/Dimpling - tools are great things!


Long interlude between posts while family, work, travel and other interests dominated - but still tried to get out to the shop as often as possible. Interesting experience to pull everything together for match-hole drilling, only to disassemble for the always-necessary deburring and dimpling. Deburring and dimpling are great, almost mindless activities that lend themselves to minutes or hours of time as available. It's fun to experieince even simple manual skills improve with repetition. I finally have a couple of dedicated days, and hope to get the priming of the horizontal stabilizer structure and skins accomplished during them. Then, back to the rivets!! Hope I haven't lost the touch (such as it was); I'll practice on a few scraps (rapidly accumulating as I discard less than perfect work) before I hit the "real stuff".

Saturday, September 18, 2010

Something that looks like it could fly!


Finished drilling and deburring the skeleton, removed the "blue stuff" from the skin (used the blunt tip of a hot soldering iron to heat lines along the blue film on the exterior surface and just removed the area adjacent to the rivet holes; I'll leave the rest on as long as possible to protect the surface), then attached the skin to the left empenage skeleton with clecos and - behold!- an airfoil (more precisely 1/2 of a horizontal stabilizer to be). Maybe a little "draggy" with all the clecos , but its looking promising!

Sunday, September 12, 2010

Progress!


Started empenage. Completed basic fore and aft spars, then pulled it all together with ribs and clecos, just to give me the sense of an 'airplane' part. Very gratifying! Hope to finish deburring, priming this week, then some riveting!! My engineer son Chris was in for a weekend visit, and I think even he was impressed!!

Monday, August 30, 2010

Empenage Inventory


The journey begins! Friday FedEx dropped off two large boxes of long-anticipated sheet metal, rivets, bolts, nuts ... you get the picture. First order of business was unpacking, carefully inventorying contents, shelving, and labeling. Van's instructions to check every piece of paper and corner of boxes were right on - the tiny parts seem to have a way of clinging to the oddest scraps and nooks. The unpacking is now complete. Next task is to read, re-read and read again the preview plans set - then its time to start cutting!

Sunday, August 29, 2010

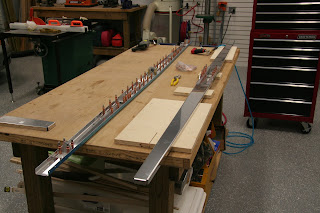
Workshop - Take 2


I rearranged the woodworking tools, organized the workbenches, created an 'open space' for a fuselage and wings (I know, impossibly optimistic as I haven't even started the empenage kit, but a man can dream) - and most importantly - got more tools! A friend recently completed an RV-8 and generously shared a number of key tools, including some pretty expensive stuff - like a pneumatic squeezer that he claims he would trade his wife for if necessary (I'm keeping that little tidbit to myself!). I back-filled gaps with orders to Isham's and Avery's - both great companies to deal with. Finally, I attended a Sportair workshop - "Building a Van's RV" - and successfully butchered a fair amount of aluminum. I returned home and dove into two practice kits - the toolbox (looked just about as bad as my Sportair aluminum massacre) and the airfoil - finally starting to look like something that might not disintegrate if exposed to air! Now I just need airplane parts to fill my newly (and neatly - for the moment) organized shop!

Workshop - Take 1


I just completed a year-long woodworking project - a Chesapeake Light Craft Annapolis Wherry. The wherry is an 18 foot rowing craft built of oak, with a marine white hull, varnished cockpit and sliding-seat rowing apparatus. It's light, sleek and a joy to row. The project was great fun, and like all projects I was
a little sad to see it completed! However, the smile on my wife's face as she rowed her new craft the first time more than compensated!! Now its time to convert the boat loft to an aircraft factory.